
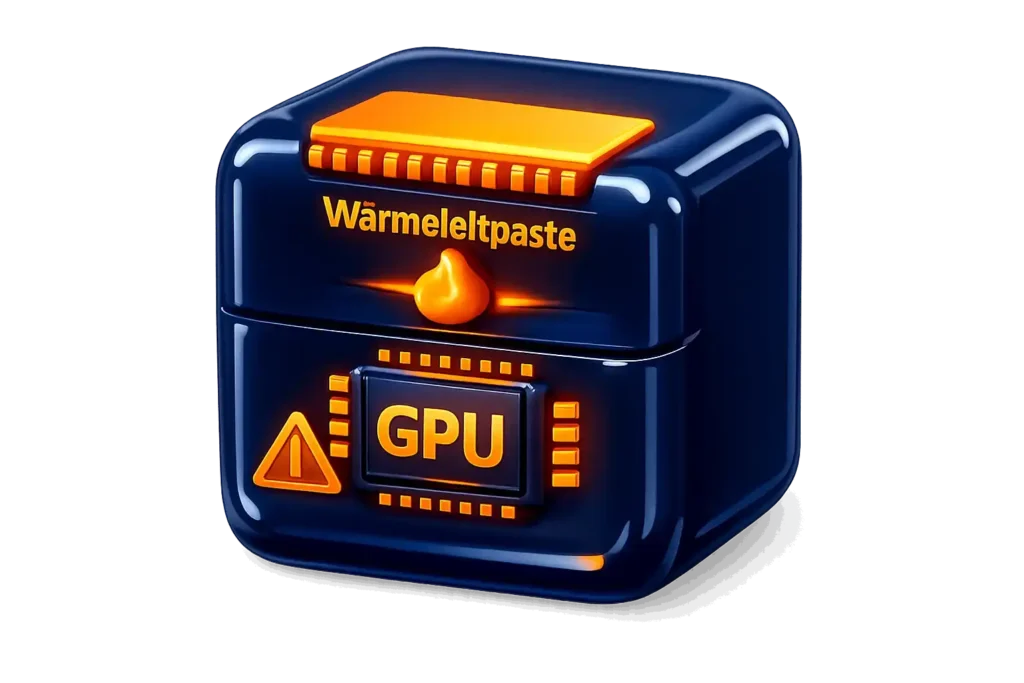
Step-by-Step Guide to Replacing GPU Thermal Paste
Last updated:
I’ve seen GPUs slow down over the years, and it kind of sneaks up on you. One day the fans get louder, the temps climb, and the games you love start to feel laggy. That’s usually when the thermal paste starts drying out. It happens because the paste faces heat every day, and heat slowly wears it out. Most makers say the paste lasts about two to five years, depending on how hard you push your card. When I end up replacing GPU paste at that point, the drop in heat feels pretty big.
Sometimes GPUs cool down by about five to fifteen degrees after fresh paste. It just makes the whole card feel steadier and safer. And if you care about gaming or creative work, keeping your graphics card happy really matters. So I like doing simple GPU thermal paste replacement as part of my normal PC hardware maintenance.
Well, here’s the deal. Old paste can dry, crack, and stop doing its job. When that happens, you might notice GPU temperature issues or a clear GPU performance drop. Fans spin harder. Games stutter. The card may even throttle. Those are the signs the thermal paste lifespan is ending.
And yeah, it kind of feels annoying, but it’s normal. Heat cycles wear everything down. A fresh repaste helps improve GPU cooling and keeps the card stable during long sessions. That’s why I always check for overheating GPU problems if my temps start climbing for no clear reason.
If you see higher temps, smell a slight hot-dust scent, or feel your GPU case getting warmer than usual under light work, that could be a hint. I usually look at symptoms first before grabbing tools. And speaking of tools, using the right stuff really helps, like good thermal paste and safe cleaners. Plus, it’s smart to think about warranty rules, since opening a newer GPU might void support.
Key Takeaways
- A GPU runs hotter over the years because the thermal paste dries from constant heat cycles.
- Most thermal pastes last around 2–5 years, so older cards often need a fresh application.
- Cleaning the old paste with 90–99% isopropyl alcohol gives the best surface for new paste.
- A pea-size dot or thin spread is enough—too much paste can trap heat instead of removing it.
- Reapplying paste can drop temps by 5–15°C, depending on the card and cooler condition.
- Reassembly needs careful alignment, proper screw tightening, and checking all fan connections.
- Regular dust cleaning, temp monitoring, and good airflow keep your GPU cooler for longer.
How to Properly Remove Old GPU Thermal Paste
I’ve learned that taking off old paste the right way really matters. If any of it stays there, it can stop the heat from moving the way it should. And that makes the GPU run hotter. Wikipedia explains that thermal paste helps fill tiny air gaps so heat can move better from the GPU die to the heatsink. And HYPERPC says old paste can dry and stick, so you have to be gentle and not force anything. So I like to slow down and clean the GPU surface the right way.
I usually start with a soft wipe. Then I use isopropyl alcohol 90% because most techs say lower alcohol has too much water. And yeah, I also try to ground myself or use a wrist strap so I don’t shock anything with static, especially when I’m replacing GPU paste and cleaning the die.
Tools You Need
- Lint-free cloth
- Isopropyl alcohol 90%
- Cotton swabs
- Gloves
Steps
- Wipe the old paste with a lint-free cloth.
- Add a little alcohol for stuck paste.
- Use cotton swabs for the edges.
- Let it dry for a few minutes.
- Do two or three passes if needed.
Cleaning Table
| Method | Drying Time | How to Check Residue |
|---|---|---|
| Lint-free cloth wipe | 1–2 minutes | Look for smudges or thick spots |
| Alcohol wipe (90%) | 2–5 minutes | Shine light at an angle to see streaks |
| Swab edge cleaning | 1 minute | Check corners for paste bits |
After that, I hold the GPU under a bright light. If I still see tiny dots or gray streaks, I clean it again. Two or three cycles usually make the GPU surface ready for new thermal paste.
How to Correctly Apply Thermal Paste on GPU/Graphics Card
I’ve seen a lot of people forget that you need to apply thermal paste on a GPU, not just a CPU. The paste helps move heat from the chip to the cooler, so the card stays safe. When you follow a simple GPU thermal paste guide, you can keep your graphics card running better and cooler, even if you’re new to beginner GPU maintenance.
The truth is, the paste dries over time because the GPU runs hot for long hours. That heat breaks the paste down. Most pastes last about two to five years, and GPUs sometimes wear paste faster than CPUs because they sit under heavy load for long gaming sessions. If you want a simple breakdown of how paste behaves under heat, this thermal paste guide explains it clearly. When the paste gets dry, the GPU cooling performance drops, and the card may run louder or throttle. So replacing it becomes part of basic care.
Before applying new paste, here’s what you need and how to do it safely in the thermal paste application steps coming next, especially if you’re replacing GPU paste for the first time.
GPU Thermal Paste Application Methods (Best Patterns Explained)
I’ve learned that the goal with GPU thermal paste patterns is simple. You just want a thin, even layer that covers the die. Too much paste traps heat. Too little leaves gaps. And because most GPU dies sit around 150–350 mm², you don’t need fancy shapes or cross patterns.
There are really only two good ways to apply thermal paste on a graphics card. Both work because paste spreads under pressure once you mount the cooler. That pressure creates the final shape, not your finger or tool. So the real focus is getting steady coverage that helps GPU cooling performance stay stable.
Main GPU Thermal Paste Patterns
- Pea-size method GPU
A small dot in the center. The cooler spreads it evenly. - Spread method GPU
A thin “buttered toast” layer using a flat tool. Good for seeing the coverage.
When to Use Each
- Pea-size works if you feel confident about the amount.
- Spread method works if you want to see the whole layer before closing the card.
If you want a quick rule, use spread if you’re unsure. Use pea-size if you already know how much paste your card needs. In the end, a consistent layer matters more than the thermal paste application technique you choose.
The Correct Method to Apply Thermal Paste on a GPU (Step-by-Step)
Here’s the correct step-by-step way I handle GPU thermal paste steps when I want a clean and safe repaste.
1. Remove the GPU safely
Power off. Unplug. Pull the card out. Ground yourself.
2. Disassemble the graphics card
Take out the screws. Lift the cooler. Keep screws in one spot.
3. Clean old thermal paste
Use 90–99% isopropyl alcohol. Wipe with a lint-free cloth. Swabs for corners.
4. Apply GPU thermal paste
Use a pea-size dot. Let cooler pressure spread it. Intel notes this avoids air pockets and helps transfer heat.
5. Reassemble and reinstall
Place cooler back. Tighten screws evenly. Put the card back in the PC.
After that, I check temps with MSI Afterburner or HWInfo to make sure everything looks normal, and if temps stay high even after repasting, adjusting fan curves can help a lot. Here’s a quick guide on how to change your GPU fan speed safely.
How Much Thermal Paste Should You Use on Your GPU?
I’ve seen people use way too much paste, and it just makes the card hotter. The goal is simple. You want a thin, even layer that fills tiny gaps on the GPU die. Too much or too little can hurt heat transfer, so the right amount really matters.
Most builders stick with a pea-size thermal paste dot, and that’s about the amount of thermal paste for GPU setups that works best. Intel also teaches the same idea, saying the cooler pressure spreads the paste and too much can slow heat movement (full credit: Intel). I like that rule because it keeps things easy and safe. And Jiuju points out that no single pattern improves results dramatically, and the real goal is just good coverage without leaking paste at the sides.
Quick Tips
- If you’re unsure, spread a thin layer so you can see the coverage yourself.
- Avoid big blobs that overflow the die.
- Use a little less rather than too much.
- Check that the surface looks fully covered with no dry spots.
For me, the best thermal paste coverage guideline is simple. A small dot or a thin spread works fine as long as the GPU thermal paste quantity stays controlled and even. The cooler does the rest.
How Often Should You Replace Thermal Paste on a GPU?
I’ve found that GPU thermal paste has a real lifespan, and you can’t just leave it forever. It dries out slowly, and that hurts cooling. Most tech guides and builders say the GPU thermal paste lifespan usually sits around two to five years, depending on how hard you push the card. HYPERPC also suggests shorter cycles for “optimal performance,” saying one to one-and-a-half years for heavy use.
Heat cycles are the big problem. The paste expands when it’s hot and shrinks when it cools. Over time, that makes the paste move outward. People call that the “pump-out” effect. When that happens, temps climb, fans get louder, and the graphics card starts feeling tired.

Signs you should replace thermal paste
- Higher temps than normal
- GPU overheating signs even in light games
- Fans ramping too often
- Small drops in performance or throttling
That’s why I check my temps every few months. It helps me know when it’s time to replace thermal paste on a graphics card before things get too hot.
How to Reassemble Your GPU and Ensure Optimal Cooling Performance
I like to take my time here because good reassembly keeps the temps steady and stops any damage. When the cooler sits right, the paste spreads the way it should, and the card runs cooler.
1. Align the heatsink
I line it up carefully so it sits straight over the die. I don’t slide it around because that can smear the paste.
2. Connect the fan cables
I plug the fan wires in first so they don’t get trapped under the cooler. I check that they click in all the way.
3. Lower the cooler evenly
I set the cooler down slowly and let it touch the die with light pressure for a second. This helps the paste settle.
4. Tighten screws in a cross-pattern
I tighten each screw with small turns, switching sides in an X pattern. This spreads pressure evenly and keeps the heatsink flat.
5. Verify electrical connections
I look at the fan plugs, any RGB leads, and the main board connector to make sure nothing is loose.
6. Reinstall the GPU into the motherboard
I push the card straight into the PCIe slot until the latch clicks. Then I check the bracket screws so the card doesn’t sag.
Torque Pattern Table
| Pattern | Why It’s Used | Tool Needed |
|---|---|---|
| Cross (X) pattern | Keeps cooler pressure even | Standard Phillips screwdriver |
| Small gradual turns | Avoids cracking the PCB | Same screwdriver |
| Final even check | Confirms all screws are snug | Same screwdriver |
After that, I power the PC on and watch the fans spin. Then I check idle temps and run a short GPU thermal performance test. If the temps look normal and steady, the reassemble GPU steps worked and the cooling is set up right.
Tips to Keep Your GPU Running Cooler and Performing Better
I’ve noticed that a GPU stays a lot healthier when you keep up with small, simple habits. Good cooling keeps the temps steady, and steady temps help the card last longer without throttling.
Smart Monitoring Habits
- I use MSI Afterburner or HWInfo to watch idle and load temps.
- Most GPUs run safely around 65–85°C under load.
- Anything near 90°C usually means a cooling problem.
- I like checking temps once a month so I can spot slow changes. Tracking trends helps me know when to fix airflow or reapply paste, and if you ever want to compare your numbers with normal ranges, this GPU temperature reference makes it easy to see what’s considered safe.
- Tracking trends helps me know when to fix airflow or reapply paste.
Maintenance Habits
- I reapply thermal paste every two to five years, depending on how hard I game.
- I clean dust from fans and filters every two or three months because dust can cut airflow by 10–20%. Keeping things clean matters, and you can follow this easy PC cleaning guide if you want a quick routine that keeps airflow strong.
- I keep cables clear so air can move across the card.
- Undervolting can help lower GPU temperatures, but I only suggest it for people comfortable with tuning tools.
Signs Something’s Wrong
- Temps rising higher than usual
- Fans getting louder all the time
- Small stutters in games or dips in performance
With these GPU maintenance tips, it’s easier to lower GPU temperatures and improve GPU performance before things get too hot. Consistent upkeep stops heat problems from building up over time.
Should You Replace Thermal Paste on an Older GPU?
I’ve seen older GPUs run hotter mainly because the paste dries after years of heat cycles. Most thermal pastes last around two to five years depending on workload, so aging cards often show higher temps. Replacing older GPU thermal paste usually improves cooling efficiency and helps keep a GPU running hot under control. It’s a simple maintenance step that can restore stability and reduce noise.
Is Reapplying Thermal Paste on a GPU Worth It?
For most cards that are two to five years old, yes, reapplying is worth it. The paste breaks down over time from the pump-out effect, which raises temperatures and lowers stability. A fresh application often drops temps by about five to fifteen degrees, depending on the heatsink condition, airflow, and how flat the GPU die is. It matters even more for gaming or rendering loads.
Benefits
- Lower load temperatures
- More stable clocks
- Reduced fan noise
- Better thermal headroom
Signs Your GPU May Need New Thermal Paste
These GPU overheating symptoms usually point to thermal paste failure signs:
- Temperatures rising month after month
- Fans ramping more often than normal
- GPU throttling during heavy loads
- Idle temps that are noticeably higher
- GPU older than three to four years or never serviced
These issues happen because old paste dries out and stops transferring heat effectively.
Tools Needed to Safely Replace GPU Thermal Paste
You only need a few basic GPU repair tools to do this safely:
- 90–99% isopropyl alcohol (evaporates fast, no water residue)
- Lint-free cloths (prevents fibers sticking to the die)
- Cotton swabs (for tight corners)
- Thermal paste (any reputable formula)
- Small Phillips screwdrivers (for safe GPU disassembly)
- Anti-static wrist strap (optional, helps prevent ESD damage)
- Compressed air (dust removal for cleaner cooling)
These thermal paste replacement tools make the job cleaner and keep the GPU safe during the process.
Does Replacing GPU Thermal Paste Void Warranty?
GPU warranty thermal paste rules depend entirely on the manufacturer. Some brands treat GPU cooler removal as tampering, while others allow it if no parts, stickers, or thermal pads are damaged. XDA Developers notes that warranty terms vary by brand. Breaking seal stickers or misplacing pads can void coverage, and rules may differ by region. Always check the official graphics card warranty terms for your exact model before removing the cooler.
Conclusion
I like keeping things simple with GPU care, and replacing GPU thermal paste is one of those small steps that makes a big difference over time. When the temps drop and the fans calm down, the whole system feels smoother and safer during long gaming or work sessions.
In the end, staying on top of paste, cleaning, airflow, and basic checks keeps any GPU running stronger for years. It doesn’t take much time, and most of the work is easy once you’ve done it once. A little maintenance now saves a lot of heat problems later.
FAQs
Can you change thermal paste in a GPU?
Yes, you can change the thermal paste on a GPU. It’s a normal maintenance step and helps restore proper cooling. Just make sure you remove the cooler carefully, clean the old paste, and apply a thin new layer before reassembling.
How often should I replace my GPU thermal paste?
Most GPUs need new thermal paste every 2–5 years, depending on heat, gaming hours, and overall workload. Heavy use may dry the paste faster, while light use can make it last longer.
Can I use 70% alcohol to remove thermal paste?
You can, but it’s not ideal. 70% alcohol leaves more water behind, which slows drying. For best results, use 90–99% isopropyl alcohol because it evaporates faster and doesn’t leave residue.
Can I replace thermal paste myself?
Yes, most users can replace GPU thermal paste with basic tools. You just need a screwdriver, isopropyl alcohol, lint-free cloths, and thermal paste. Taking your time and following each step carefully makes the process safe.
Why is thermal paste critical for GPU performance?
Thermal paste fills tiny gaps between the GPU die and the heatsink. This improves heat transfer, lowers temperatures, and prevents throttling. Without good paste, heat builds up and the GPU can lose performance.
Is too much thermal paste bad for a GPU?
Yes. Too much paste can trap heat, spill over the edges, or reduce contact between the die and the cooler. A small pea-size dot or a thin spread is the safest amount.
What supplies do I need to replace GPU thermal paste?
Essential supplies include:
90–99% isopropyl alcohol
Lint-free cloths
Cotton swabs
Quality thermal paste
Small Phillips screwdriver
Anti-static wrist strap (optional but safer)
Compressed air for dust removal
These tools help you clean the old paste properly and apply the new layer safely.
Is isopropyl alcohol safe for cleaning old thermal paste?
Yes. Isopropyl alcohol (90–99%) is the safest and most common way to remove old thermal paste. It evaporates fast, leaves no residue, and won’t harm the GPU die when used with a lint-free cloth or cotton swab.
What’s better: pea-sized or spread methods for applying thermal paste?
Both work, but the pea-sized method is easier for beginners because cooler pressure spreads the paste evenly. The spread method gives visual confirmation of full coverage but requires a bit more care. Either method is fine as long as the layer is thin and even.
How do I know if I applied the right amount of thermal paste?
You likely applied the right amount if:
The GPU temperatures look normal under load
Fans aren’t ramping harder than before
The cooler sits flat with no paste leaking from the edges
A thin, even layer is the goal, not a thick coat.
Can using too much thermal paste damage my GPU?
Yes, in some cases. Extra paste can spill over the edges and reduce heat transfer. If the paste is conductive or capacitive, overflow can also cause shorts. Keeping the amount small prevents these risks.
Can I reuse old thermal paste after removing the heatsink?
No. Once the paste is disturbed, it can’t spread properly again. Old paste forms air pockets and loses its thermal performance. Always clean it off and apply a fresh layer.
Do GPUs and CPUs require different thermal paste application techniques?
They use the same types of paste, but GPUs usually have larger, flat dies, so simple patterns (pea-size or thin spread) work best. CPUs sometimes have different heat spreader sizes, but the overall goal is the same: thin, even coverage.
Will replacing thermal paste improve my GPU’s lifespan?
It can help. Lower temperatures reduce thermal stress on components, which supports long-term stability. Fresh paste won’t “extend lifespan” by years on its own, but it keeps the GPU running cooler and prevents heat-related throttling and wear.